8 Easy Steps: How to pay NSSF Online
This tutorial covers NSSF Kenya online returns and assumes your registration with NSSF on the portal is already complete. These steps are applicable to both new NSSF rates and old NSSF rates. See NSSF new rates Calculator
NSSF Kenya payment deadline for any month is the 15th day of the following month.
Step 1: Create Excel File
Compose a Microsoft Excel file with all the required columns as per the NSSF file format template.
If you are using Wingubox Online Payroll, this file is auto-generated for you in your NSSF Report (New format)
Notice the new format has no NSSF contribution amounts but will instead work with employees’ Gross Salaries. This file also contains NSSF Membership Number, KRA PIN, and any voluntary amounts.
To make manual (offline) returns, there is no need to go to step 2 of this tutorial. Simply select NSSF Reports (Old format) on your Wingubox Payroll application and take to nearest NSSF office (branch) along with your payment.
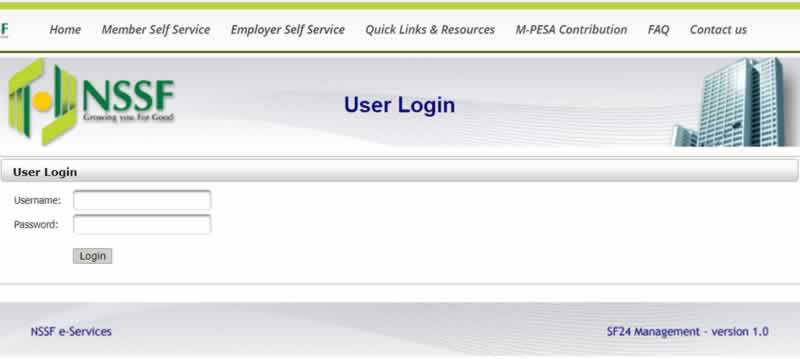
Step 2: Log in to NSSF Self Service
Browse to NSSF Self Service Login also known as SF24 Management and enter your username and password.
If you do not have your login credentials, contact NSSF for assistance
Step 3: Create Payroll Period
Once logged in, select Payroll Converter on the left-hand menu
On the payroll period section, click ‘Create Payroll Period’ and enter the payroll month, payroll type and contribution type.
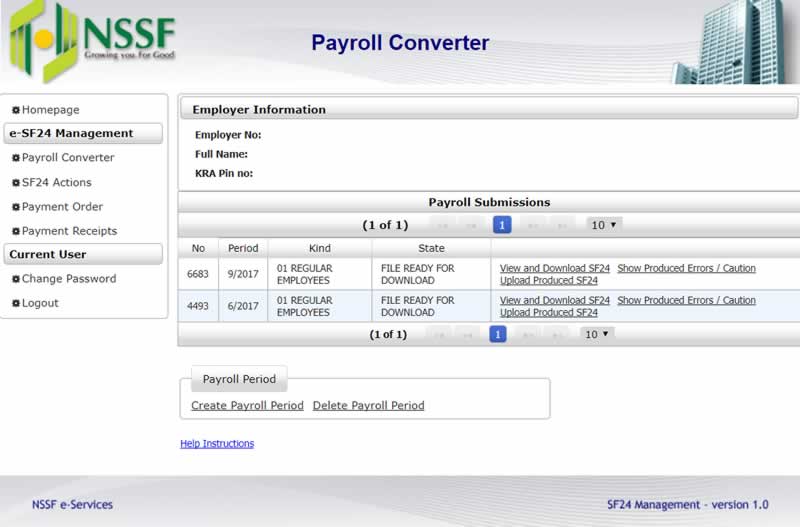

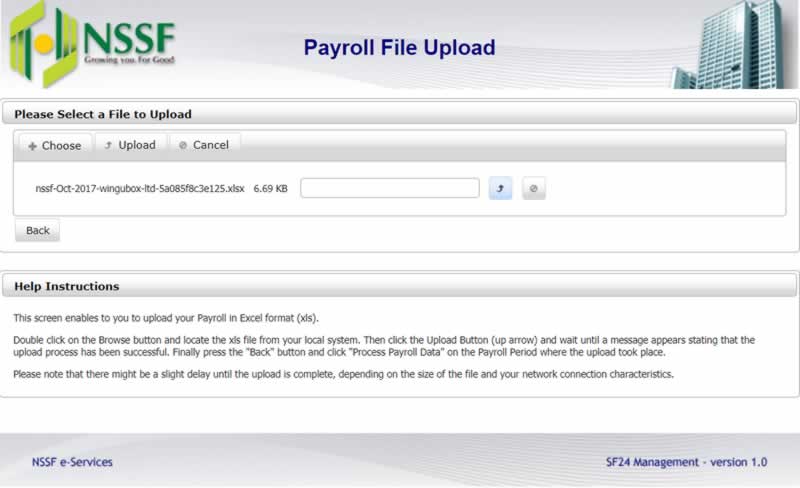
Step 4: Payroll Submission
After step 3, you will now have a new item on your list of ‘Payroll Submissions’.
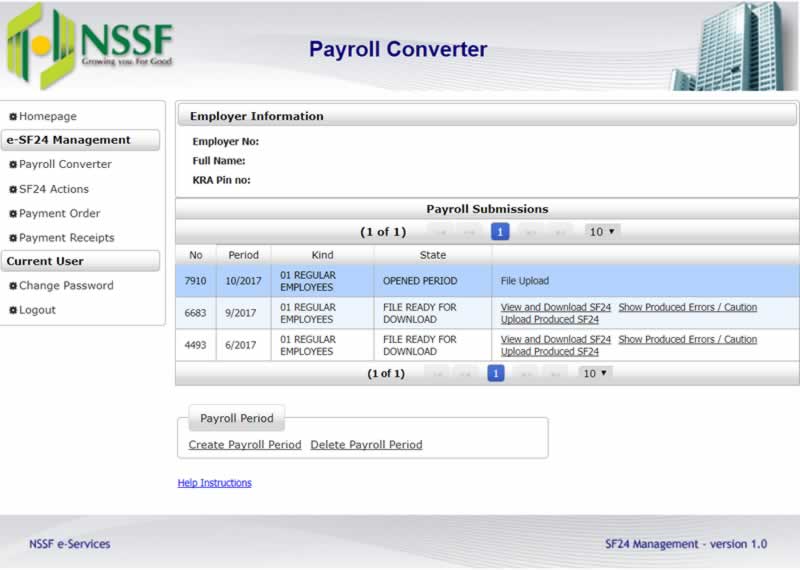
Locate the latest submission with status ‘OPENED PERIOD’ and click ‘File Upload’ link
This will take you to an interface which will allow you to ‘Choose’ the Microsoft Excel file created in step 1 from your local machine and click ‘Upload’ to submit it to NSSF server
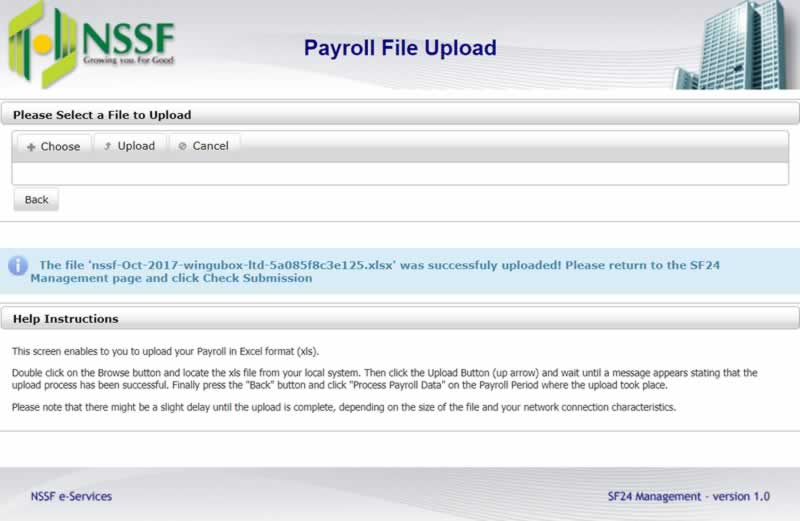
Step 5: Process Payroll Data
Once your file is successfully uploaded, click the ‘Back’ button to return to ‘Payroll Submissions’ section.
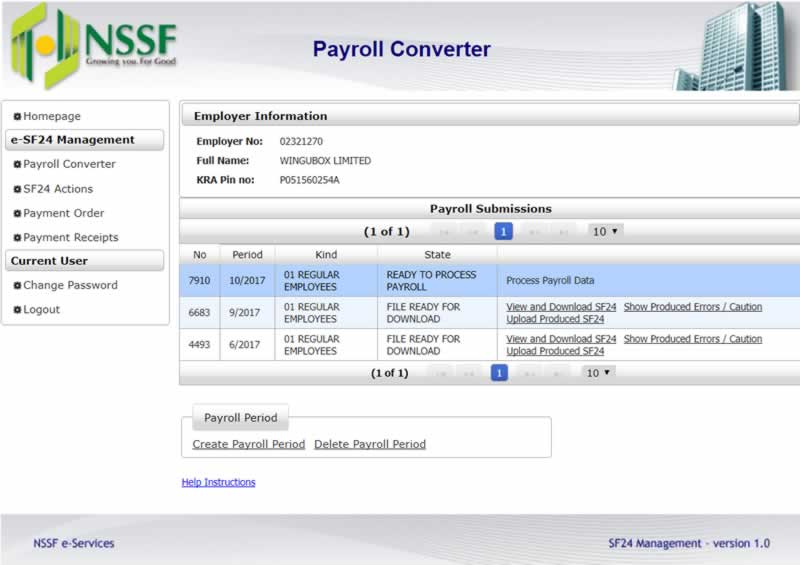
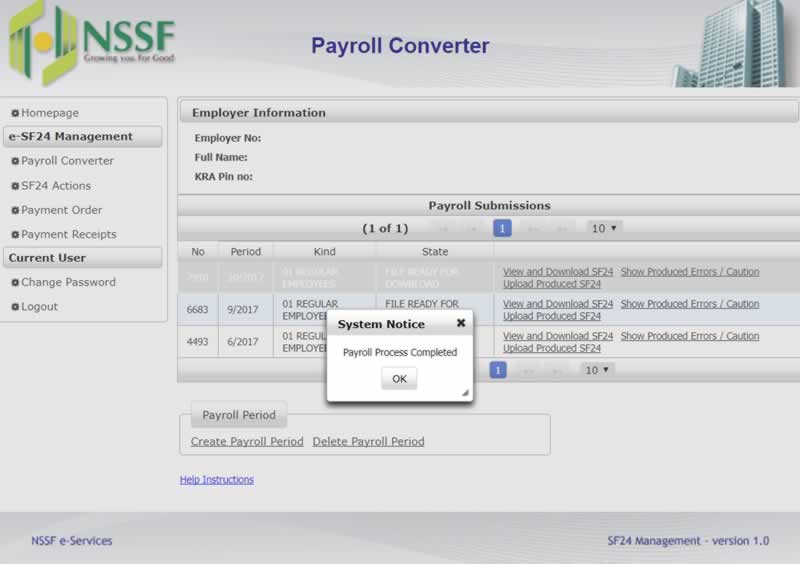
You’ll notice your submission has now been updated with a ‘Process Payroll Data’ link. Click on this link to initiate payroll data processing by NSSF server. It will use employees’ gross salaries to determine NSSF contributions due by both employee and employer. It will then produce a file dabbed ‘SF24’
Your latest submission should be updated with a new set of links. Click on the link that reads ‘Show produced errors’ to determine if there are any errors that NSSF has detected. If you have errors, return to your excel sheet and correct this accordingly. Delete the payroll period and create a new one.
If you have no errors, proceed to ‘Upload Produced SF24’.

Step 6: SF24 Submission
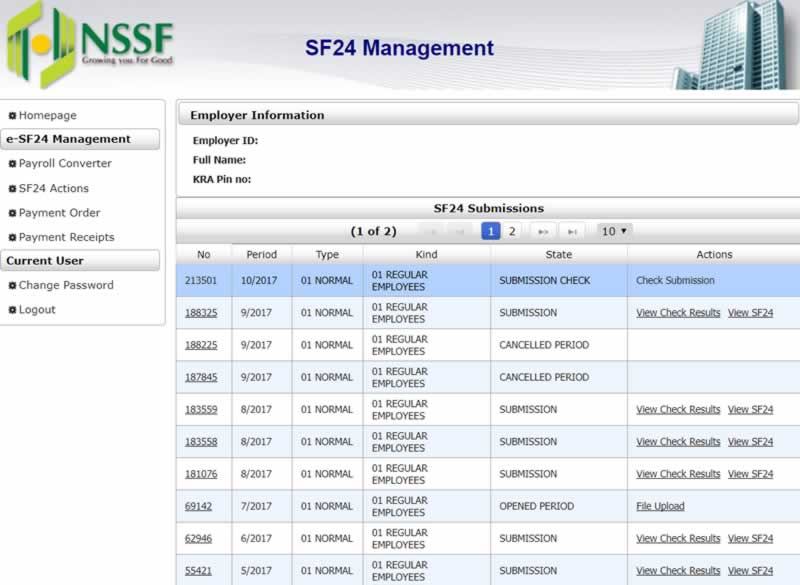
On the left-hand side menu, click ‘SF24 Actions’
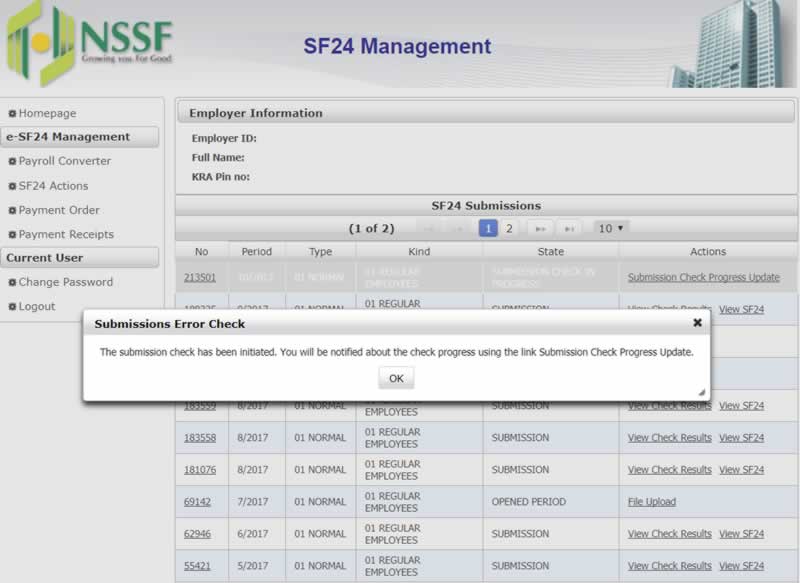
Your latest SF24 submission should be first on the list of submissions with the status ‘SUBMISSION CHECK’. Select the action ‘Check Submission’. Once submission is complete, click on the new link that appears ‘Submission check progress updates’. This will help you get notified when submission of your SF24 is finalized.
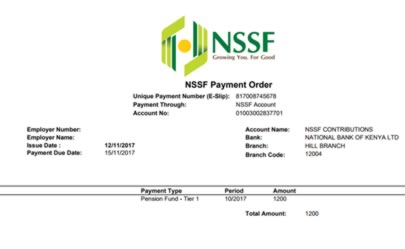
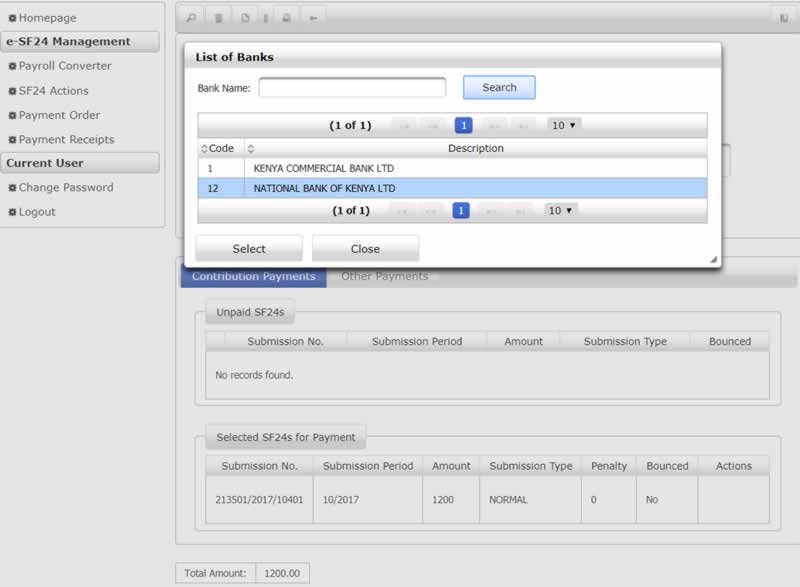
Step 7: Payment Order
You are now ready to make your payment order.
Select ‘Payment Order’ on the left-hand menu. Enter a payment description, e.g. ‘October 2017’. Enter a payment mode of your choice. Enter the bank which you’ll be using to make payment (PS: This is not your organization’s bank but rather NSSF bank accounts to which you’ll pay the monies due. There is a choice of either National Bank or Kenya Commercial Bank).
Next, drag any unpaid SF24s from ‘Unpaid’ section to ‘Selected SF24s for Payment’ section.
A final total of amounts due will display at the bottom of the forms.
Click the ‘Save’ icon located on the horizontal bar, at the top of the forms. NSSF server will produce a Unique Payment Number (UPN) which will be used as your payment reference.

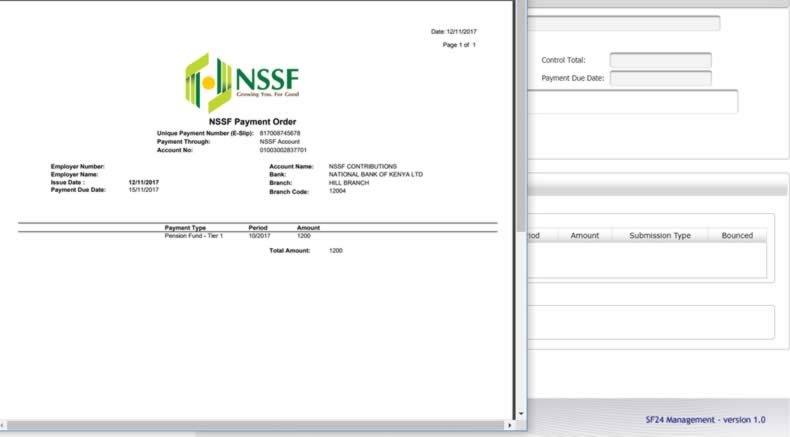
Step 8: Print and Pay
Select ‘Payment Orders’ on the left-hand menu. Click on the ‘Search’ icon located on the horizontal bar, at the top of the forms
Search for the payment order you just made using the date range calendars. Once you locate the payment order, select it and proceed to click the ‘Print’ icon located on the horizontal bar, at the top of the forms.
Print out the resulting output for onward payment with respect to the ‘Payment Mode’ you selected in step 7.
Once NSSF has received your payments, you can confirm this in the ‘Payment Receipts’ link on the left-hand menu.
Also read: How to file NHIF byproduct online and Online PAYE Calculator
Try Wingubox Online Payroll with 30 day free trial
Latest posts

New NSSF Rates for 2026
New NSSF Rates for 2025